Ways to keep your house cool this summer!

These hints will help you reduce energy use along with the temperature. As summer arrives, many people think, “Thank goodness for air conditioning.” That is, until the bill for cranking the A/C arrives. Fortunately, there are many energy-efficient ways to keep your house cool. Beat the heat this summer with these home cooling tips.
- Choose an energy-efficient system. If you’re buying a colling system, choose one that’s ENERGY STAR rated. If you already have A/C, get your system professionally inspected and cleaned according to the manufacturer’s instructions to keep it operating at its best.
- Change your filters: Furnace filters should be changed every month or two. Have your air ducts checked for leaks, and make sure vents aren’t blocked by furniture, appliances, or other objects. A bit of maintenance can make a big difference.
- Insulate your home: Adding attic insulation is one of the easiest, least expensive ways to cool your home.
This is my third home purchase and by far Trevor the inspector for Area Home Inspection has impressed me with his attention to detail and his customer service. I kept interrupting him to ask questions and with a smile he stopped what he was doing and answered me. I recommend using Trevor at Area Home Inspection when buying a house.
6 ways to unclog a drain
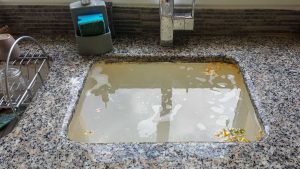
 There are a lot of projects around the house you DIY with just a little know-how and some elbow grease. Here, we teach you several ways to unclog a kitchen sink drain without calling a plumber.
It can be a helpless feeling when a clogged kitchen sink won’t drain. With water backing up and a counter full of dirty dishes waiting to be cleaned, it may be tempting to reach for the phone and call the plumber to fix the problem for you. But before you do that, first read these easy, do-it-yourself ways to unclog that drain. You can do it! Read on to learn how.
1: Start with boiling water: This is the easiest and least expensive solution of all, which makes it the best one to try first. Here’s how:
While you’re waiting for the water to heat, remove as much standing water from the sink as you can, using a mug or small pot to boil out the water.
Pour the entire kettle of water into the sink and let it sit for a couple of minutes. If the water stands in the sink without draining, that means the clog is still there.
Try the process again. You may need to repeat the process several times to move the clog, but this strategy often works on many types of blockages.
2: Check the garbage disposal.
The next thing you should do is check to make sure your garbage disposal isn’t causing the problem. A clogged disposal can easily stop up the drain, so run the disposal for a minute or two with hot water running to see if that clears the clog.
3: Use salt and boiling water:
After removing as much standing water from the sink as possible, pour about half a cup of table salt down the drain. Then pour in about a quart of boiling water. Let it sit for a few minutes, and then flush with hot water to clear the mixture.
4: Try vinegar and baking soda. Again remove any standing water before you try this technique. Pour about a cup of baking soda into the drain, followed by an equal amount of white or apple cider vinegar. The solution will soon start the bubble; when it subsides, put the stopper in and wait about 15 minutes. Next, run the hot water to see if the clog clears. Repeat the process one more time.
5: Baking Soda and Salt:
This is another combination that can clear out sink clogs. Mix about a cup of baking soda with half a cup of salt, and pour this mixture down the drain. Let the mixture sit for several hours, then flush with boiling water. You can repeat this process again if it doesn’t work the first time.
6: Get out the plunger.
If any of the previous home remedies aren’t successful in unclogging your sink drain, it’s time to reach for a common household plunger. If you have a double sink, first seal the drain on the other sink with a wet cloth or a stopper. You’ll need to create a tight seal around the plunger, so fill the side of the sink you intend to plunge with enough water to cover the bell of the plunger.
How to remove stains from a driveway

Having a Minneapolis asphalt driveway gives your property a huge boost in curb appeal. Being one of the many benefits of using asphalt, its ability to make your home beautiful makes it a popular choice.
However, if your asphalt driveway has stains from oil and grease, it can easily become an eyesore. Not only that, big oil and grease stains in your driveway or garage make their way into your home, potentially ruining your carpet and spreading everywhere else.
Fortunately, while these oil stains can seem impossible to remove, there are ways you can eliminate them using common household products and a little bit of elbow grease.
Let’s take a look at these common household products you can use to remove oil stains from your asphalt easily.
Dish soap is a go-to cleaning product when it comes to removing oil and grease, be it on dishes or on your asphalt. To use, simply pour a generous amount over the stains, add a little bit of water, and scrub the pavement with a hard bristle brush. Then, rinse it using a garden hose to remove the suds. Repeat the process if necessary to remove all the stains.
Powdered Detergent is an effective item to remove stains on clothes, but can also be used on other surfaces like your pavement. To use, sprinkle the stain with the powder until it’s completely covered. Add a little bit of water and scrub the pavement with a stiff brush. Then, let sit for an hour to give time for the detergent to penetrate. After an hour, spray it off and repeat if necessary.
Cat Litter, while not intended for cleaning purposes, cat litter proves to be effective in grease and oil stains in asphalt pavements. After mopping excess oil, then sprinkle the cat litter on top of the stain. Stomp on the litter to ensure it can reach deep down into the surface. Then, leave it overnight before sweeping it off and sparing the surface with water the next day.
Baking Soda: Sprinkle a generous amount of baking soda on top of the oil stain, and add a bit of water to get it slightly wet. Then, brush the stain using a circular motion until the stain begins to come up. Once done, rinse it off with water and repeat the process if necessary.
WD-40: Spray this product onto the oil stain and let it sit for about 30 minutes. WD-40 is strong enough to not require scrubbing to remove the stain. If needed, you can choose to scrub the surface with a hard bristle before rinsing it off with water after another 30 minutes.
Oven Cleaner is another potent product to use, an oven cleaner can be sprayed on asphalt oil stains. Let it sit for 5 – 10 minutes before scrubbing with a hard brush, and spray with a hose to rinse it off.
Cola can be used to remove the remaining oil stains after cleaning the top layer of stains using the methods mentioned earlier. To use, pour a can of soda (any brand) onto the dry oil stain. Let it sit for 6 hours to let it seep through the asphalt. Then, pour one more can of soda onto the stains and scrub the area with a hard brush. Let it sit for another hour before spraying it off with water.
How to fix a leaky hose bib?

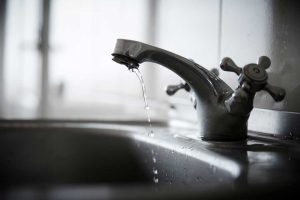
If you discover that one of your hose bibs is leaking, you may be able to repair it yourself. Here are step-by-step instructions for diagnosing and correcting the source of your leak.
Tighten the packing nut. Grab pliers or a wrench, and tighten the packing nut next to the faucet’s handle. Take care not to tighten the packing nut so much that the handle is hard to turn or you damage the fixture. Turn the water on and off, and if if the dripping stops, nothing else needs to be done. If the hose spigot continues leaking even after you’ve tightened the packing nut, you may need to replace the packing washer.
Before replacing the packing washer, turn off the water supply. Next, drain the faucet. Be sure to do this before taking the handle assembly apart. User pliers or a wrench to the packing nut counterclockwise until you can remove the handle assembly.
Remove the packing screw inside the handle assembly. Remove the packing screw inside the handle assembly. With the packing screw removed, use a standard (or slotted) screwdriver to pry the packing washer out. It’s a good idea to take the old washer to the hardware or plumbing supply store to make sure you purchase a replacement washer that is the proper size.
Replace the packing washer and screw. Insert the new washer and screw it in place. Reassemble the faucet handle and tighten the packing nut. Again, take care not to overtighten and possibly damage the packing nut. Turn on the water supply and turn the faucet on and off a couple of times to test your repair.


